
Why Make This Grandma’s Pie Crust
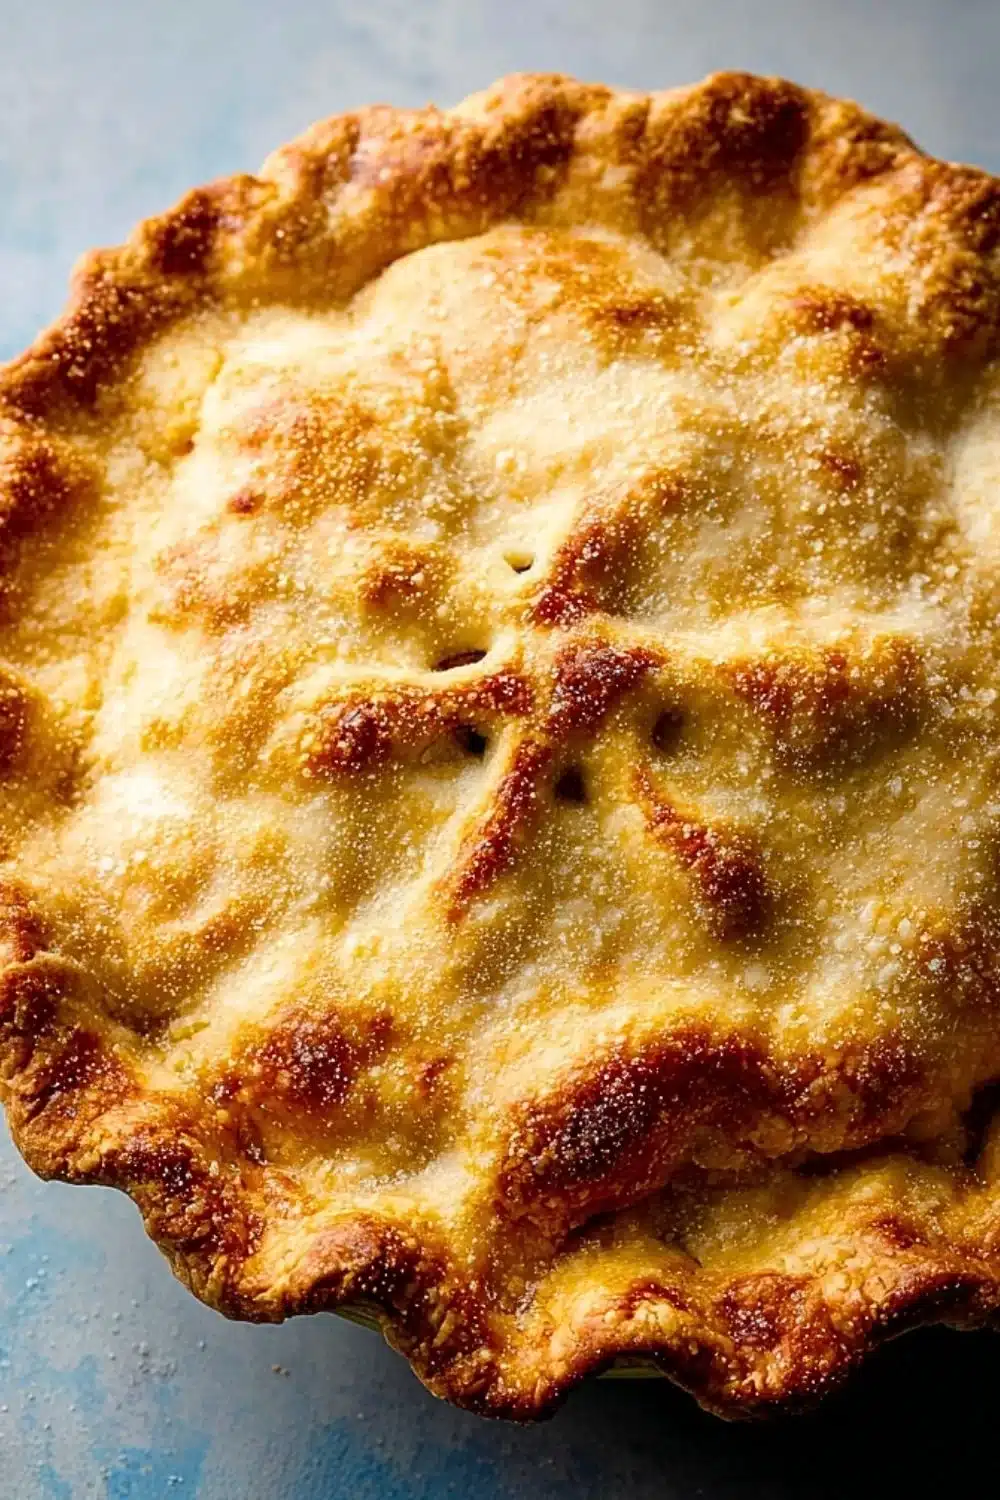
Grandma’s pie crust is more than just a recipe; it’s a cherished tradition passed down through generations. This flaky, buttery crust serves as the perfect foundation for any pie, whether filled with sweet fruits or savory fillings. What sets this recipe apart is its simplicity—using only a few wholesome ingredients, it allows the flavors of the pie filling to shine. By making this crust from scratch, you’ll enjoy a delightful texture and taste that store-bought versions simply can’t match. Each bite melts in your mouth, making every pie a little masterpiece.
How to Make Grandma’s Pie Crust
Making your own pie crust may seem daunting, but with Grandma’s method, you’ll feel like a pro in no time. The key is to keep your ingredients cold, especially the butter, which contributes to the crust’s flakiness. This step-by-step guide ensures that you achieve a smooth, pliable dough that rolls out beautifully, so you can get ready to impress your family and friends.
Ingredients:
- 2 1/2 cups all-purpose flour
- 1 teaspoon salt
- 1 cup unsalted butter, cold and cubed
- 6 tablespoons ice water (plus more as needed)
- 1 teaspoon sugar (optional)
Directions:
- Cut the butter into small cubes and place it back in the fridge or freezer to keep it cold.
- In a large bowl, whisk together the flour, salt, and optional sugar.
- Add the cold butter to the flour mixture. Cut it in using a pastry cutter or fork until you have coarse crumbs with some pea-sized bits. This step is crucial for achieving that light, flaky texture.
- Slowly drizzle in the ice water, starting with 6 tablespoons. Mix gently with a fork, adding more water as needed until the dough starts to clump. It should feel moist but not sticky.
- Turn the dough out onto a floured surface and gently knead just until it holds together. Avoid overworking the dough to keep it tender. Divide it into two discs.
- Wrap the discs in plastic wrap and refrigerate for at least 1 hour or up to overnight. This resting period helps the gluten relax and improves the crust’s texture.
- When ready to use, let the dough sit at room temperature for 5–10 minutes. Roll it out to about 1/8 inch thick, ensuring an even thickness for even baking.
- Fit the dough into your pie plate, trim excess dough, fold the edges under, and crimp for a beautiful finish. Chill again for another 15–20 minutes before baking.
- For blind baking, preheat the oven to 375°F. Line the crust with parchment paper and use pie weights to prevent bubbling. Bake for 15–16 minutes, remove the weights, and bake for 10–12 minutes more until golden brown.
- Use as directed in your desired pie recipe—this crust complements countless fillings!
Nutritional Information
- Calories: 350 per serving
- Total Fat: 24g
- Saturated Fat: 15g
- Carbohydrates: 29g
- Dietary Fiber: 1g
- Sugars: 0g
- Protein: 4g
- Sodium: 275mg
(Nutritional values are estimated based on a standard serving size and can vary based on specific ingredients used.)
How to Serve Grandma’s Pie Crust
Grandma’s pie crust pairs wonderfully with both sweet and savory fillings. Serve it with a classic apple filling for a cozy dessert, or use it for a hearty quiche for brunch. Top with a scoop of vanilla ice cream for an extra-special touch! It’s also perfect for festive occasions; imagine your loved ones gathering around a beautifully baked pumpkin pie during Thanksgiving.
How to Store Grandma’s Pie Crust
If you have leftovers or want to prepare ahead, store your pie crust in the refrigerator for up to three days. Wrap it tightly in plastic wrap to prevent it from drying out. If you prefer to freeze it, you can do so for up to three months. Just be sure to thaw it overnight in the refrigerator before using, and let it come to room temperature before rolling it out.
Expert Tips for Perfect Grandma’s Pie Crust
- Keep It Cold: Remember, the colder the butter, the flakier your crust will be. You can even chill your flour for a few minutes before mixing.
- Don’t Rush the Resting Time: Allowing the dough to rest helps develop the flavors and texture. Overnight resting yields the best results.
- Use a Light Touch: When mixing the ingredients, handle the dough as gently as possible. Overworking it can lead to a tough crust.
Delicious Variations
- Herbed Pie Crust: Add fresh herbs like rosemary or thyme to the flour for a savory touch perfect for quiches or pot pies.
- Sweet Pie Crust: Mix in a tablespoon of cinnamon or nutmeg for a warm flavor that pairs well with sweet apple or pumpkin pies.
- Whole Wheat Version: Substitute half of the all-purpose flour with whole wheat flour for a nuttier flavor and added nutrition.
Frequently Asked Questions
1. Can I use margarine instead of butter?
Yes, you can use margarine as a substitute, but the flavor and texture may not be as rich. Unsalted butter is preferred for a classic pie crust.
2. What can I do if my dough is too dry?
If your dough feels dry and crumbly, slowly add more ice water, a tablespoon at a time, until it begins to come together. Be cautious not to oversaturate!
3. How can I tell when my crust is done baking?
The crust should be a light golden color when done. If the edges seem to brown too quickly, you can cover them with foil to prevent burning while the center finishes baking.
Conclusion
Grandma’s pie crust is an essential recipe that adds warmth and nostalgia to any kitchen. Its simple ingredients, alongside easy instructions, make it a great entry point for home bakers of all levels. Whether you’re filling it with fresh fruits or hearty meats, this crust will elevate your pie game. So, gather your ingredients, roll up your sleeves, and indulge in the satisfying joy of baking! Share your results and let us know how it turned out—we’d love to hear from you!
Print
Grandma’s Pie Crust
- Total Time: 45 minutes
- Yield: 2 crusts 1x
- Diet: Vegetarian
Description
A flaky, buttery crust that serves as the perfect foundation for any pie, whether filled with sweet fruits or savory fillings.
Ingredients
- 2 1/2 cups all-purpose flour
- 1 teaspoon salt
- 1 cup unsalted butter, cold and cubed
- 6 tablespoons ice water (plus more as needed)
- 1 teaspoon sugar (optional)
Instructions
- Cut the butter into small cubes and place it back in the fridge or freezer to keep it cold.
- In a large bowl, whisk together the flour, salt, and optional sugar.
- Add the cold butter to the flour mixture. Cut it in using a pastry cutter or fork until you have coarse crumbs with some pea-sized bits.
- Slowly drizzle in the ice water, starting with 6 tablespoons, mixing gently until the dough starts to clump.
- Turn the dough out onto a floured surface and gently knead just until it holds together. Divide it into two discs.
- Wrap the discs in plastic wrap and refrigerate for at least 1 hour.
- When ready to use, let the dough sit at room temperature for 5–10 minutes, then roll it out to about 1/8 inch thick.
- Fit the dough into your pie plate, trim excess dough, fold the edges under, and crimp for a beautiful finish.
- Chill again for another 15–20 minutes before baking.
- Preheat the oven to 375°F. Line the crust with parchment paper and use pie weights. Bake for 15–16 minutes, remove weights, and bake for an additional 10–12 minutes until golden brown.
Notes
Keep the butter cold for a flakier crust and do not overwork the dough.
- Prep Time: 15 minutes
- Cook Time: 30 minutes
- Category: Dessert
- Method: Baking
- Cuisine: American
Nutrition
- Serving Size: 1 slice
- Calories: 350
- Sugar: 0g
- Sodium: 275mg
- Fat: 24g
- Saturated Fat: 15g
- Unsaturated Fat: 9g
- Trans Fat: 0g
- Carbohydrates: 29g
- Fiber: 1g
- Protein: 4g
- Cholesterol: 60mg
Keywords: pie crust, dessert, baking, homemade, flaky, buttery